Nikon FG Manual: A Comprehensive Guide
Dive into the world of film photography with this detailed guide! Explore the Nikon FG, a camera offering substantial photographic hops, even decades after production ceased.
Master its operation by carefully studying the instructions within this manual, and practice using the FG before loading film.
Access valuable resources, including PDF manuals and support from online communities like OrphanCameras, to enhance your experience.
The Nikon FG, released in 1982, represents a pivotal point in Nikon’s history, bridging the gap between fully mechanical SLRs and more technologically advanced models. It’s an entry-level camera celebrated for its robust build quality and surprisingly comprehensive feature set, making it a fantastic choice for both beginners and experienced photographers alike.
This guide aims to provide a thorough understanding of the Nikon FG, from its historical context to practical operation. Whether you’ve recently acquired an FG or are considering one, this manual will equip you with the knowledge to unlock its full potential. Remember to study the instructions carefully and practice with the camera before using film.
The FG’s appeal lies in its blend of simplicity and capability, offering a rewarding analog photography experience.
Historical Context and Significance
Launched in 1982, the Nikon FG arrived during a significant shift in the photographic landscape. It followed the popular Nikon FM and FE series, offering a more affordable entry point into the Nikon system without sacrificing core quality. More than four decades after its production ended, the Nikon FG remains a highly sought-after camera.
Its significance stems from being a well-built, reliable, and feature-rich camera accessible to a wider audience. The FG democratized SLR photography, allowing enthusiasts to experience Nikon’s renowned engineering and optics. It served as a stepping stone for many photographers, fostering a love for the craft.
Today, the Nikon FG represents a tangible link to a bygone era of analog photography, valued for its simplicity and enduring appeal.
Key Features and Specifications
The Nikon FG boasts a robust electronic shutter, offering speeds from 1 to 1/1000th of a second, plus Bulb mode. It features both aperture-priority auto exposure and full manual control, providing versatility for various shooting scenarios. The camera accepts Nikon F-mount lenses, granting access to a vast range of optics.
Key specifications include a top shutter speed of 1/1000 sec, ISO range of 25-3200, and compatibility with Nikon Speedlights like the S8-15 and SB-18. It utilizes a mechanical horizontal-travel cloth focal-plane shutter.
Its lightweight body and ergonomic design contribute to comfortable handling, making it a practical choice for photographers of all levels. The Nikon FG is a testament to Nikon’s commitment to quality and innovation.

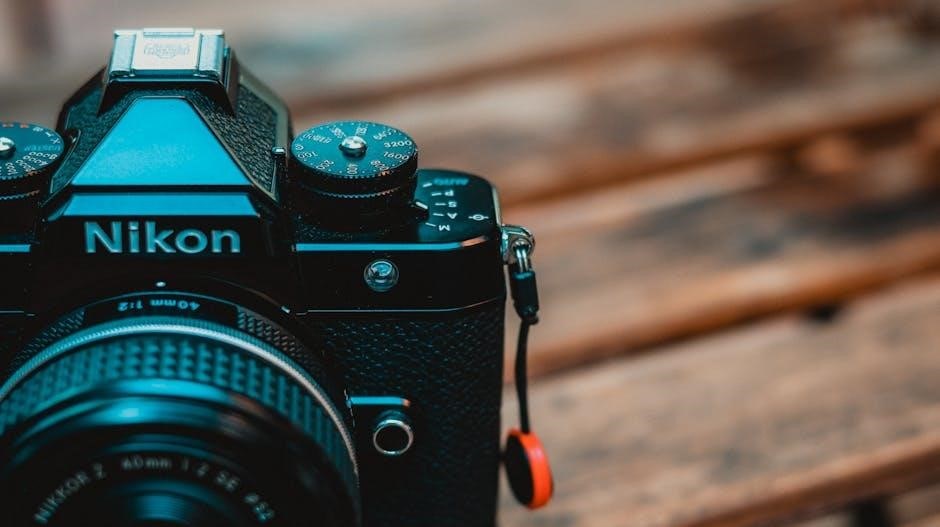
Understanding the Camera Body
Familiarize yourself with the Nikon FG’s layout! Explore its controls, dials, and viewfinder – essential for mastering this classic camera’s operation and features.
Controls and Dials Overview
The Nikon FG boasts a straightforward control layout, designed for intuitive operation. Key dials include the shutter speed dial, offering a range typically from 1 to 1/2000th of a second, and the aperture control on the lens itself. Understanding these is crucial for mastering exposure.
The mode dial allows selection between Aperture Priority, Shutter Priority, and Manual modes, providing versatile shooting options. Pay attention to the film speed dial, ensuring it’s correctly set to match your film’s ISO. The rewind crank and film advance lever are essential for film handling.

Additional controls include the depth-of-field preview lever and the self-timer. Practice manipulating these dials without film loaded to become comfortable with their functions before embarking on serious shooting. Careful study of these instructions will unlock the FG’s full potential.
Viewfinder Information
The Nikon FG’s viewfinder provides essential shooting data. You’ll find a central focusing screen with cross-hair focusing points, aiding in precise image composition. Crucially, the viewfinder displays the selected shutter speed, visible when operating in Shutter Priority or Manual mode.
In Aperture Priority mode, the viewfinder shows the recommended shutter speed determined by the camera’s metering system. LED indicators alert you to potential over or underexposure, guiding you to adjust aperture or shutter speed accordingly. A center-weighted metering spot illuminates during exposure measurement.
The viewfinder also indicates if the film is advancing correctly and provides a visual cue for the self-timer. Familiarize yourself with these indicators to ensure accurate exposure and sharp focus. Careful observation of the viewfinder is key to successful photography with the FG.

Film Loading and Unloading
Loading film into the Nikon FG is a straightforward process. First, open the camera back using the film release lever. Insert the 35mm film cartridge into the film chamber and thread the film leader onto the take-up spool. Advance the film using the film advance lever, ensuring the sprocket holes engage properly.
Continue advancing the film and checking the rewind knob to confirm it’s rotating, indicating film is being taken up. Close the camera back securely. To unload, press the film rewind button on the bottom of the camera and rotate the rewind knob in the direction of the arrow.
Carefully remove the film from the camera. Practice this process with an expendable film roll until comfortable. Proper film loading and unloading are vital for preserving your images and the camera’s functionality.
Exposure Settings and Operation
The Nikon FG offers versatile exposure control, including Aperture Priority, Shutter Priority, and Manual modes. Master these settings to achieve desired photographic results!
Aperture Priority Mode
Aperture Priority mode on the Nikon FG allows you, the photographer, to select the desired aperture (f-stop), directly influencing the depth of field in your images. The camera then automatically sets the appropriate shutter speed for correct exposure.
This mode is exceptionally useful for controlling creative elements like background blur (bokeh). A wider aperture (smaller f-number, like f/2.8) creates a shallow depth of field, isolating your subject against a blurred background. Conversely, a narrower aperture (larger f-number, like f/16) yields a greater depth of field, keeping more of the scene in focus.
Remember to monitor the shutter speed indicated by the camera; ensure it’s fast enough to prevent motion blur, especially when handholding the camera. Experiment with different apertures to understand their impact on your photographs and unlock your creative vision with the Nikon FG!
Shutter Priority Mode
Shutter Priority mode on the Nikon FG empowers you to choose the shutter speed, controlling how motion is captured in your photographs. The camera then automatically calculates and sets the appropriate aperture for proper exposure.
This mode is ideal for freezing action or intentionally blurring movement. A fast shutter speed (e.g., 1/500s) freezes fast-moving subjects, while a slow shutter speed (e.g., 1/30s) creates motion blur, conveying a sense of speed or movement.
Pay attention to the aperture selected by the camera; ensure it provides sufficient depth of field for your scene. Be mindful of camera shake when using slow shutter speeds – a tripod is highly recommended. Practice with various shutter speeds to master motion control with your Nikon FG!
Manual Exposure Mode
Manual Exposure mode on the Nikon FG grants you complete control over both the shutter speed and aperture. This mode requires a solid understanding of the exposure triangle – the relationship between ISO, aperture, and shutter speed – to achieve correctly exposed images.
Utilize the FG’s metering system as a guide, observing the light meter in the viewfinder. Adjust the aperture and shutter speed until the meter indicates a proper exposure. This mode is invaluable for challenging lighting situations where automatic modes may struggle.
Practice is key to mastering manual exposure. Experiment with different settings to understand their impact on your images. Embrace the learning process and unlock the full creative potential of your Nikon FG!
Focusing and Metering
Achieve sharp images with the Nikon FG’s focusing system and utilize its metering modes for accurate exposure. Master focus lock and depth of field!
Autofocus System Details
The Nikon FG, while a fantastic camera, does not feature an autofocus system. It relies entirely on manual focusing, a characteristic common for cameras of its era. This means photographers must actively adjust the focus ring on the lens to achieve sharpness.
Precise focusing is achieved through the viewfinder, utilizing the split-image rangefinder in the center. Aligning the split image indicates the subject is in focus. Alternatively, the viewfinder offers a cross-hair focusing aid for general composition and focusing.
Practice is key to mastering manual focus. Understanding depth of field and utilizing techniques like pre-focusing can significantly improve your success rate. While lacking autofocus, the Nikon FG encourages a more deliberate and engaged approach to photography.
Metering Modes Explained
The Nikon FG utilizes a center-weighted metering system. This means the camera prioritizes the light reading from the central portion of the frame, approximately 66% of the area, while giving less weight to the edges.
Understanding this bias is crucial for accurate exposures. When photographing scenes with strong backlighting or significant contrast, slight exposure compensation may be necessary. The camera’s meter displays a needle in the viewfinder, indicating under, correct, or overexposure.
Adjust aperture and shutter speed based on the meter reading to achieve the desired exposure. Remember to consider the scene’s dynamic range and your creative intent. Mastering the center-weighted metering system allows for consistent and reliable results with the Nikon FG.
Focus Lock and Depth of Field
The Nikon FG allows for focus lock, enabling you to separate focusing from recomposing. Half-press the shutter button to lock focus on your subject, then recompose the shot while maintaining the half-press. This is useful when your subject isn’t directly under the active focus point.
Depth of field, the area in acceptable focus, is controlled by aperture. Smaller apertures (higher f-numbers like f/16) yield greater depth of field, ideal for landscapes. Larger apertures (lower f-numbers like f/2.8) create shallow depth of field, isolating your subject.
Experiment with different apertures to understand how they affect the look of your images with the Nikon FG, and utilize focus lock for precise control.
Using Flash with the Nikon FG
Enhance your photography with compatible Nikon Speedlights like the S8-15 or SB-18! Utilize flash exposure compensation for perfectly lit images.
Compatible Nikon Speedlights
The Nikon FG offers excellent compatibility with a range of Nikon flash units, significantly expanding your creative possibilities. Specifically, the camera functions seamlessly when used alongside Nikon Speedlights such as the renowned S8-15. This allows for precise control over lighting conditions, enabling photographers to achieve professional-looking results in various scenarios.
Furthermore, the FG also works effectively with the SB-18 flash unit, providing another reliable option for supplemental illumination. When utilizing these Speedlights, remember to explore the camera’s flash exposure compensation features. This functionality is crucial for fine-tuning the flash output, ensuring balanced and properly exposed photographs, especially in challenging lighting environments. Experimenting with different flash settings will unlock the full potential of your Nikon FG and its compatible flash units.
Flash Exposure Compensation
Flash Exposure Compensation (FEC) is a vital tool when using the Nikon FG with external flash units. It allows you to override the camera’s automatic flash exposure settings, providing precise control over the brightness of your images. This is particularly useful in situations where the camera’s meter might be fooled by bright or dark backgrounds.
By adjusting the FEC, you can brighten or darken the flash output, ensuring your subject is properly exposed. Positive compensation values increase flash power, ideal for backlit scenes, while negative values decrease power for overly bright situations. Mastering FEC with your Nikon FG and compatible Speedlights like the SB-18 or S8-15 unlocks creative control, allowing you to achieve perfectly balanced and professionally lit photographs consistently.
Maintenance and Troubleshooting
Keep your Nikon FG in top condition with regular cleaning and proper storage. Address common issues promptly for continued reliable performance and enjoyment!
Cleaning and Storage
Maintaining your Nikon FG ensures its longevity and optimal performance. Regularly clean the camera body with a soft, dry cloth to remove dust and fingerprints. Avoid using harsh chemicals or solvents, as these can damage the finish.
Pay close attention to the viewfinder and film chamber, gently removing any debris with a blower brush. For the lens, use appropriate lens cleaning solutions and microfiber cloths.
Proper storage is crucial. When not in use, store the Nikon FG in a cool, dry place, away from direct sunlight and extreme temperatures. Consider using a camera bag or case to protect it from dust and accidental impacts. Remove the batteries to prevent corrosion.
Regular care will keep your FG functioning beautifully for years to come!
Common Issues and Solutions

Encountering problems with your Nikon FG? A common issue is film not advancing; check the battery and ensure proper film loading. If the shutter doesn’t fire, verify the aperture priority or shutter priority settings are correctly engaged.
Light leaks can occur with older cameras – inspect the light seals around the film door and replace if necessary. Metering inaccuracies might arise; consider a CLA (Clean, Lubricate, Adjust) service from a qualified technician.
If the viewfinder is dim, ensure the diopter adjustment is set correctly for your vision. Remember to consult online forums and resources like OrphanCameras for further troubleshooting assistance. Don’t attempt repairs you’re uncomfortable with!
Professional servicing is often the best solution for complex issues.